Teton Tested: Dynafit’s Beast 14 Touring Binding


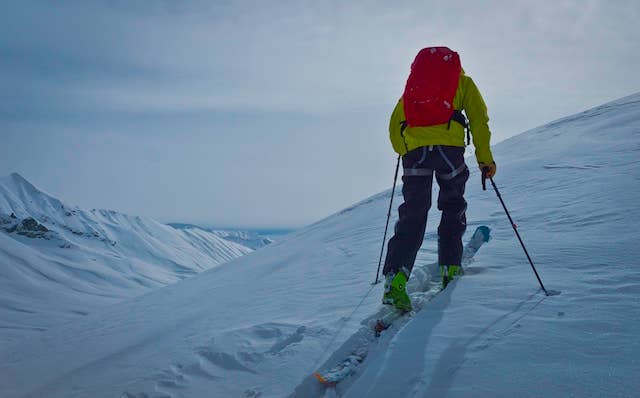
 SASS Global Travel guide, Pete Connolly, uses the Dynafit Beast 14 to tour Alaska. Lucas Moore photo.
The Dynafit BEAST 14, new for this past season, is, for me, the best touring binding on the market. There are a few limiting features and some frustrating design issues, but overall I was more than satisfied with its performance throughout this entire season.
I put around 40 days on this binding between Japan, Colorado, Washington, Wyoming and Alaska this season in just about every possible snow condition from the bottomless pow of Hokkaido, to the refrozen cement of the PNW. I had them mounted to a pair of 190 Rossignol Squad 7s and used my
K2 Pinnacle 130s I tested earlier this winter as the boot of choice. I kept both the heel and toe at a DIN of 13 from day one. I am 6’4”, 200 pounds, and like to push my gear as hard as it will let me, and I’m not really sure if I ever found this binding’s limit.
The only time I ejected without wanting to was when I went full gaper and got blasted by a chairlift on its swing-around the bull-wheel. Knocked me right out of both skis. I was blown away, as I had yet to double eject during any previous fall, but this flail was in no way a ‘skiing motion’ for which the binding was designed. It did however convince me that the binding does actually release when necessary.
After the launch of the Beast 16 last season, Dynafit looked to reduce the weight and tourability while maintaining a higher din setting with the 14. Being a little pricier, they're not for those trying to get into the backcountry on a budget. But, with the higher price tag comes a burlier, more trustworthy binding than the rest of the new tech set-ups out there, and you manage to save some energy and a hundred bucks by not maxing out with the Beast 16. Unless you are rocking that DIN at 15, I don’t see much reason to bypass the 14.
TECH SPECS
 The Beast 14 bindings rotate slightly to allow movement between the toe and heel before releasing. Lucas Moore photo.
The Beast 14 is basically a combination of the Dynafit Radical 2.0’s toe piece and the Dynafit Beast 16’s heel piece with a slightly less intense spring. It weighs in at 795 grams, not particularly light, but when comparing it to something like the Salomon Guardian 13’s weight of 1451 grams, you can really start to see the benefit.
Both the heel and toe piece are allowed to rotate slightly, so that the boot toe and heel are able to move laterally before release. This increases elasticity and gives the ski more room to flex both while initiating a turn on harder snow and while recovering from a hard landing without the binding releasing.
I was blown away by how much it felt like I was in an alpine binding the first time I stepped into the Beast 14. The increased elasticity and, in turn, the additional DIN gave me the confidence I had always lacked in my previous tech bindings.
Until the release of the Beast 16, tech bindings struggled to find release values greater than 10 or 12 due to their lack of elasticity and the reduction in housing material. Now with the beefier heel piece and the rotating heel and toe, the Beast 14 is capable of a DIN from 5 to 14. Additionally, The Dynafit Beast 14 achieved the sought-after TÜV quality seal based on DIN ISO 13992 standards. Meaning that it is one of the only tech bindings on the market to be officially DIN certified.
The Beast 14 has a stand height of 16 mm at the toe and 23 mm at the heel. This means that your boot is much closer to the ski than in a AT frame binding or even the Fritschi Vipec, which stands at 36 mm.
For the way up, the Beast 14 has medium and high heel risers, but lacks a flat touring option.
DOWNHILL PERFORMANCE:
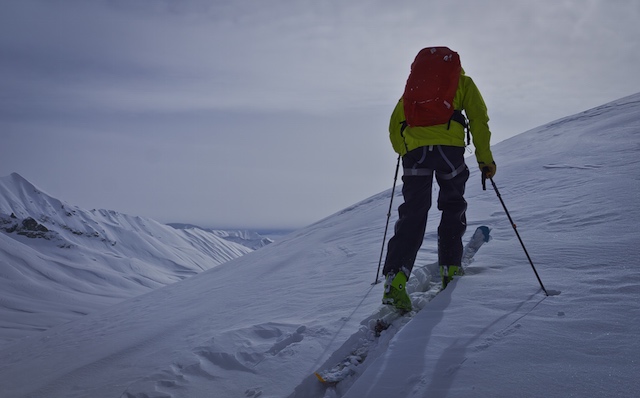
 Pete tests downhill performance of the Beast 14 in Alaska this April. Lucas Moore photo.
I was blown away by how much it felt like I was in an alpine binding the first time I stepped into the Beast 14. The increased elasticity and, in turn, the additional DIN gave me the confidence I had always lacked in my previous tech bindings.
I spent the first 20 days on this binding in Japan. The binding did not release once. I did not once feel as though it should have either. From pillow lines to catching tips on small branches to backseat landings to tomahawks to bottomless turns, I never once had an issue on the down.
I first put it to the truest test at Crystal Mountain in early March, when my alpine setup had a binding issue and my only other option was to ski my backcountry setup on piste. It hadn’t snowed in weeks, had gotten really warm, then froze, then snowed 3 inches. I was on lumpy cement in the wrong ski. With the 120 mm waist of the Squad 7, I would have been very hesitant to aggressively shut down my speed on edge with any other tech binding due to the lack of elasticity and increased torque created by the wider ski waist. I skied harder and faster as the day progressed and was amazed at how well the binding handled the conditions.
When it finally came time to release, I was in Tahoe in full-on saturated spring conditions (surprise, surprise). I came over a roll and the snow went to mashed potatoes and I went straight over the handlebars and the stuck ski released. This was the exact type of fall that could have resulted in a serious knee injury, but instead the Beast did its job and let go at the right time.
UPHILL PERFORMANCE:
The Beast 14 is noticeably heavier than my previous Radical on the up, but I still found it to have a great glide and easy pivot. The lack of a flat touring position could be a problem for those who typically take long flat approaches to their lines. I don’t find myself on too many of those types of missions. I like to head straight up and get to the down as fast as possible. Again, not the binding for everyone and if you are consistently traveling long distances over flat terrain, you probably fall into this category.
My recent trip to Alaska was my first without the use of a helicopter. This meant a lot of touring. We used snowmobiles to avoid the flats, but gaining ridges and accessing our actual lines were all done on foot and took most of the day. On these steep and time consuming missions I found the binding to be exactly what I wanted. Maybe I would have voted for something a bit lighter mid ascent, but as soon as I clicked in at the top, staring down an exposed line, frothing over how hard I planned to shred, I was more than glad to have the Beast 14 attached to my skis.
Sign Up For Our Newsletter
OVERALL PERFORMANCE
 The BEAST 14 bindings were found to have a great glide and pivot during touring. Lucas Moore photo.
I started out touring on the Fritschi Freeride Pro, and went through four pairs under warrantees before jumping ship and moving onto the Marker Duke. After going through two pairs of Dukes, I was tired of the weight and sick of the diminishing performance due to degradation of the plastic over time. I then made the cross-over to the Dynafit Radical, which I have used as my primary touring binding for the past couple seasons and never even thought about looking back.
Not having to lift and entire binding attached to my foot every step and the more natural pivot point under my toe made for an endlessly easier uphill battle. On the way down, I was more than stoked on the much smaller stand height giving me the responsiveness and maneuverability of an alpine binding. Originally, I wasn’t too worried about the lower DIN setting because I was primarily skiing in the soft snow you tend to be searching for while entering the backcountry. That said, whenever I got onto variable snow or more exposed lines, I found myself locking down the toe piece for confidence. The more I did this, the more I realized I was using the wrong tool for the job. Now, the Beast 14 has given me the right tool for the job and then some.
ISSUES:
 Snow tends to get caught in the riser of the binding packed under the heel. Pete Connolly photo.
Despite my obvious love for this binding, there still are a few issues that should be mentioned. First and foremost is that when in tour mode with the heel riser in the mid position, snow slowly gets caught in the riser and is packed under your heel a little bit at a time until it actually starts to rise your heel even further. This is especially a problem when breaking trail in deep snow, as there is a lot of loose snow running over this area of the binding. This required regular poking with my ski pole to make sure that it didn’t get packed too much. Once the higher heel riser is in place, it blocks snow from accessing this area, so it is not a problem. Definitely something that should be considered in designing future models.
Another issue with that mid level heel riser is that it is incredibly difficult to disengage. Since the heel riser is what holds the breaks up while in tour mode (hence no flat touring option), this is part of the transition process back into ski mode. After much pulling and wrenching and frustration, I figured out a way to use my ski pole as leverage to get it to release. Unfortunately this is not an easy process if you are trying to transition without taking your skis off. I figured that it would become easier with time, but it has yet to get any easier at this point.
 The mid-level heel riser is difficult to disengage so some leverage may be needed. Lucas Moore photo.
In order for the heel of your boot to lock into the binding, an additional horseshoe shaped metal adapter must be added. It replaces the small metal piece that engages the pins into your heel and creates a solid bar that is used to push the entire heel piece back before locking into your boot. Installation requires two additional holes in your boot, but is super easy with a little drilling.
Unfortunately, these pieces will not fit into Black Diamond boots without a bit of customization. Not really Dynafit’s problem, as BD has chosen to stray from the original pattern for their own heel insert design that differs by millimeters from everyone else’s. The larger issue with this additional hardware comes when you want to use a different binding with your boot. When I transitioned into my alpine bindings, I had to remove this piece every time so that the heel was properly aligned into the standard binding. If I did not remove it, I am sure the metal would have degraded the heel piece and messed with its releasability. It takes about a minute, but the hassle was really in keeping track of the pieces until my next tour.
Other than these couple of frustrations, not much else bad to say about the Beast 14. Just watch out on the brakes as they come out of the box almost razor-sharp.
BOTTOM LINE
 The BEAST 14 has a stand height of 16mm at the toe and 23mm at the heel meaning the boot is much closer to the ski. Lucas Moore photo.
If you are looking for a touring binding that gives you more confidence on the down without increasing the weight too much and still giving you all of the benefits of a tech binding on the up, this is the binding for you. Stay away if you are looking for something to cross-country ski in or if you don’t need as much DIN. Jump on board if you spend significant time in the backcountry, want to ski bigger more aggressive lines and haven’t ever really 100% trusted your tech bindings–and if a good portion of your income is disposable.