
How To: Mountain Bike Set Up Basics
Popular Stories


 Setting up your bike properly before you ride will make all the difference on the trail. Katie Lozancich photo.
Setting up your mountain bike might seem like some sort of black magic to many. Ever feel like your bike just isn’t performing the way you want it to? Well it might be time to put in some hours at the gym - but having everything set up properly will certainly help too. While there is definitely no single “right” way to set up a bike, here are a few of the most important variables to consider next time you feel like something feels off.
Suspension Set Up
Perhaps the single most noticeable part of the “feel” of a mountain bike lies in suspension. The squishy bits of your bike – fork and shock – are what will most directly affect its feel on the trail. Depending on what particular fork and shock you run, you will have different degrees of adjustability. However, any fork and shock can and should be adjusted properly for rider weight. This starts with measuring and setting your sag. Speaking from experience, I can say that most beginner and intermediate riders set their suspension up with far too much pressure, making their rides harsh and fatiguing. Sag is easy to set up – here’s how to do it:
- 1. Inflate your fork/shock to the manufacturer- recommended PSI. Most forks have a sticker that say how much corresponds to your weight. Shocks will vary based on tune and frame design, so there is no standard here.
- 2. Slide the o-ring to the bottom of your stanchion on your fork and shock.
- 3. Have someone sit on your front wheel to stabilize the bike and stand on your pedals in a neutral riding position.
- 4. Using either the stanchions markings (found on RockShox forks) or using a ruler, measure how much travel your fork uses in this position. Proper sag for a fork is 15-20% (more sag means a plusher ride but less bottom out resistance). Most bike frames work best with 30% sag on your rear shock. Again, the amount of sag you run is entirely based on rider preference.
- 5. Let out air or inflate as necessary to achieve proper sag both front and back.
Coil shocks and setting sag are a bit more complicated – this will come down to finding the proper spring for your weight and adjusting preload. Trial and error are unfortunately part of this process and swapping out coils will require removing the shock from your frame.
Once your sag is set, it’s time to mess with compression and rebound settings. This comes down entirely to rider preference, style, and what terrain is on tap. Compression adjustment will control how fast your fork can compress, while rebound controls its return speed. Turn the dials to each extreme, compress your suspension a few times, and you’ll quickly understand the effects.
Essentially, the quickest way to set these up properly is to find a short section of trail and adjust the dials through trial and error. I recommend starting in the middle settings of each and going either up or down from there. Focus on how the bike feels both at high speed over rough stuff, and on big impacts like off a drop.
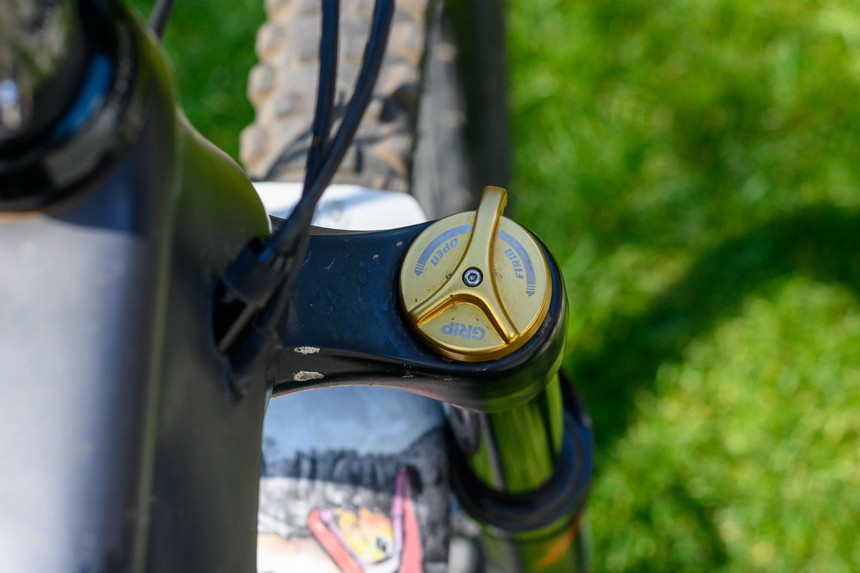 Fox's GRIP damper keeps compression adjustment simple, offering low-speed compression and rebound. Higher-end dampers will provide additional external tuning options like separate high-speed compression and rebound. Max Ritter photo.
For another point of adjustability, most air forks and shocks are further tunable through volume spacers. These will shrink the air volume inside the air spring, making the fork and shock more progressive (feeling ever-stiffer as it goes through its travel). It helps prevent bottoming out, and for those of us that like to jump, it provides some extra pop for boosting off lips. Additionally, it will allow you to run slightly lower pressures and still achieve the same sag, making the fork and shock feel more supple over small bumps.
Changing volume spacers is slightly more involved, as it requires taking all the air out of your fork and shock, unscrewing the air spring, and threading in the plastic spacers. If you don’t have the necessary tools, or feel uncomfortable doing it yourself, your local bike shop will usually do this for you in a few minutes.
Sign Up for the TGR Gravity Check Newsletter Now
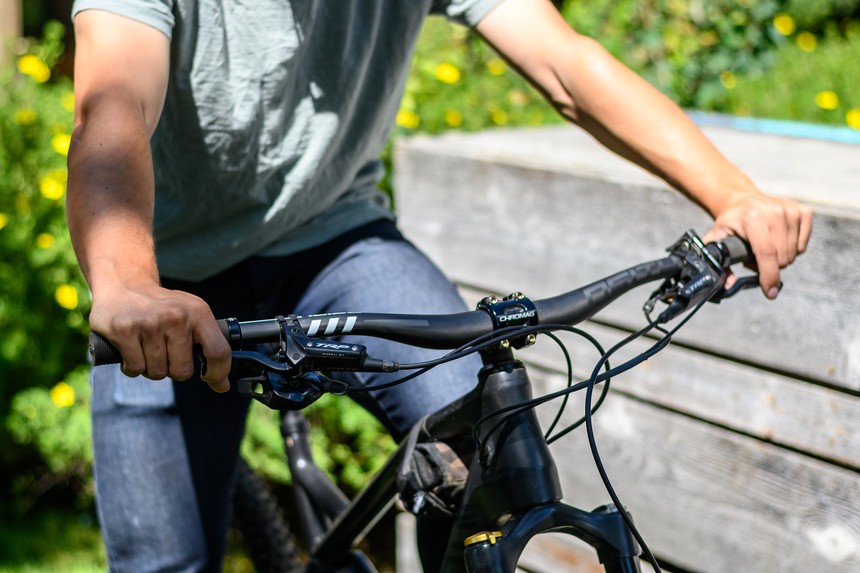
Cockpit and Contact Points
Beyond suspension, the next important part to proper bike set-up are your contact points. These are the points where your body physically touches the bike. Think: grips, pedals, and seat. All three are entirely based on rider preference, but it’s worth investing in proper pedals, comfortable grips, and a seat that fits your butt shape.
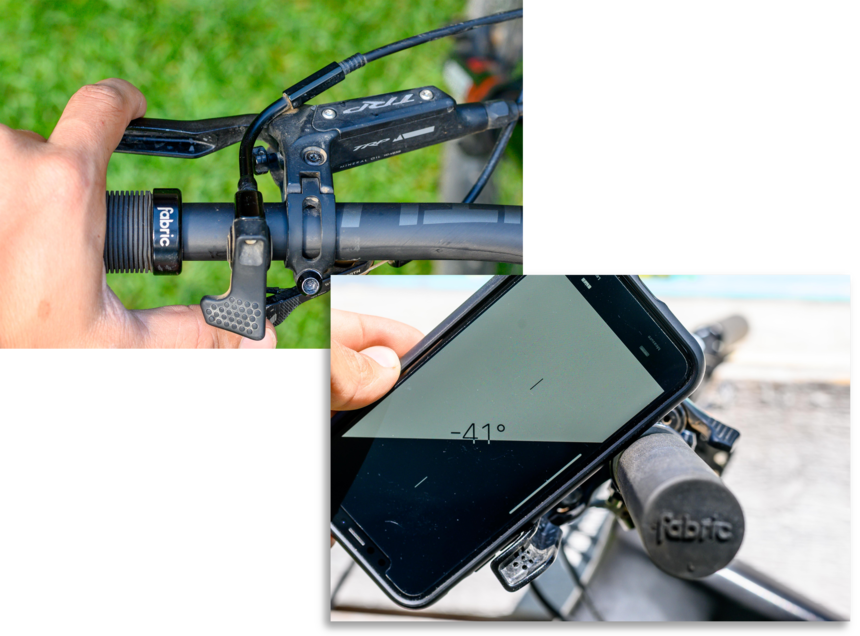 I tend to run my brake levers at slightly flatter than 45 degrees, it makes my wrists happier. Depending on how long your brake levers are (TRP brakes have super-long levers), run the lever clamp further inbound. Max Ritter photos.
A properly set up cockpit will also make your life much more comfortable on the trail. Bar roll, brake lever angle, shifter/dropper lever position, and brake lever reach should all be set for your hands. Break out the ruler and level (the app on your smartphone is good enough), and get that cockpit dialed. While all these variables can be changed based on your own preference, above is an idea of how I set up mine.
Seat Height
Seeing people riding with too low of a seat height makes my heart sink. Making sure your seat is set high enough will boost your efficiency, ease the load your knees and hips take, and put your body in a more aggressive climbing position. Too high, on the other hand, and your efficiency goes out the window. See below for a properly set up seat (at full extension on a dropper post).
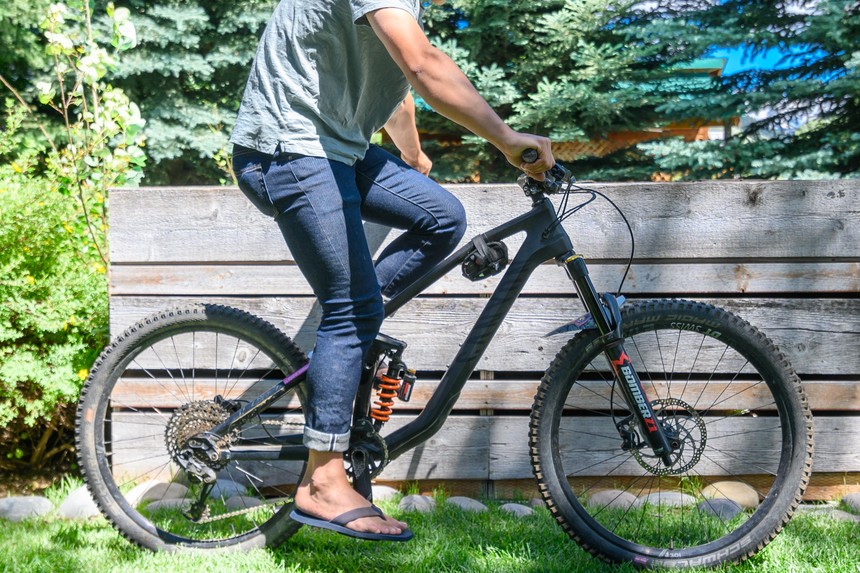 A proper seat height will allow your knee to still slightly bend at the bottom of your pedal stroke. Katie Lozancich photo.
Tire pressure
Finally, the last major variable on your bike is tire pressure. Exact pressures will depend largely on trail conditions but being intentional with how much air is in your tires can make your day that much better. Larger tires, wider rims, and tires inserts like Schwalbe Procore or the like will allow you to run lower pressures (18-25 psi). This means more traction in loose and dusty conditions. However, if you’re looking for more speed on hardpack, higher pressures (30ish psi) are your friend. Keep a good pump with a pressure gauge in your vehicle and check your pressure before every ride.
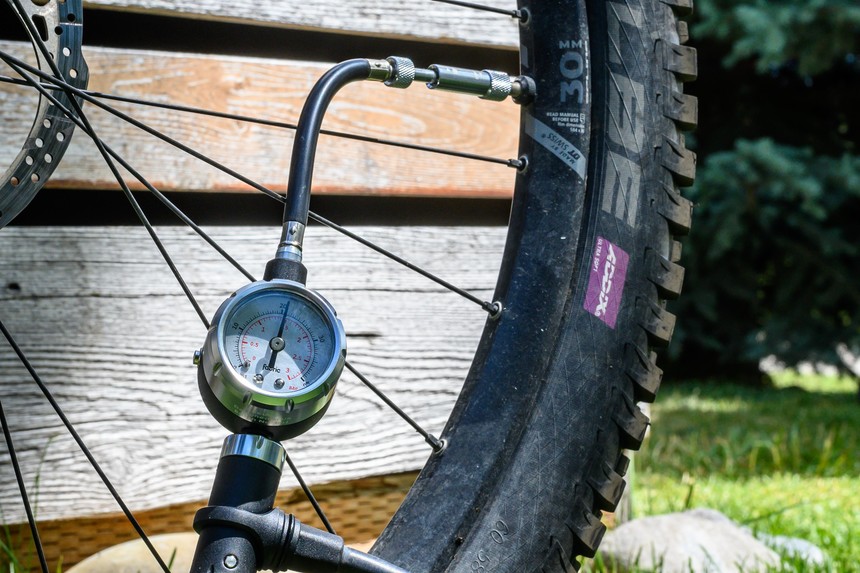 Even tubeless tires lose small amounts of air every ride, so make sure your pressures are still where you want them to be. Max Ritter photo.