 You've got a lot invested in your bike, so let's make sure that sweet ride is dialed in and performs the way it was designed to. We're going to set your shock and fork up right by covering sag, rebound, high- and low-speed compression. Perform the adjustments in this order.
SAG
Sag is the percentage of travel your bike’s suspension needs to support just your body weight. It's critical to set sag correctly for a bike to perform as designed. Rule of thumb is to set sag at 15-25% (a few points more for longer travel bikes or if you like a plusher ride and less for shorter travel or if you like a stiffer ride). Sag is adjusted by adding air to the suspension components and then measuring how your seated weight affects the bike using the rubber 'O' ring.
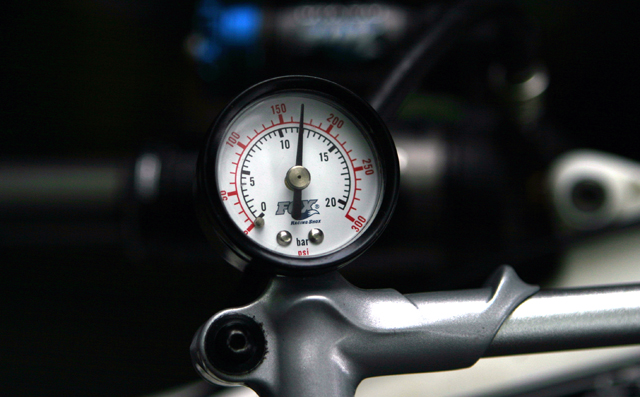 Sag is adjusted
by adding air, measured in PSI, to your bike’s fork or shock.
Sag is adjusted
by adding air, measured in PSI, to your bike’s fork or shock.
Bikes will come with a recommended PSI for your weight as a starting point. Your weight should take into account your pack, helmet, clothing, shoes etc. Not just that awesome number when you weigh yourself in the morning with no clothes on. Unless that’s how you ride...
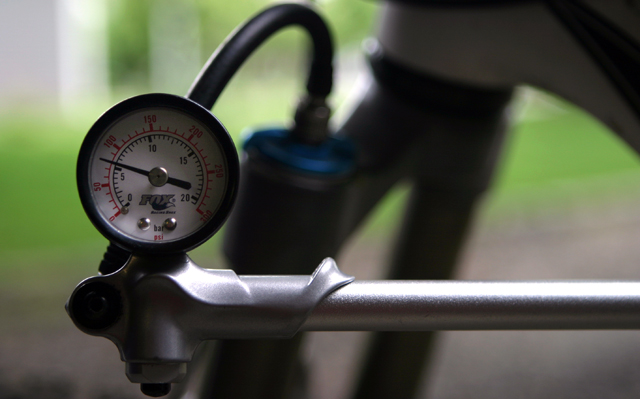 Using a shock pump, add air to the fork and
shock to reach the recommended PSI.
Using a shock pump, add air to the fork and
shock to reach the recommended PSI.
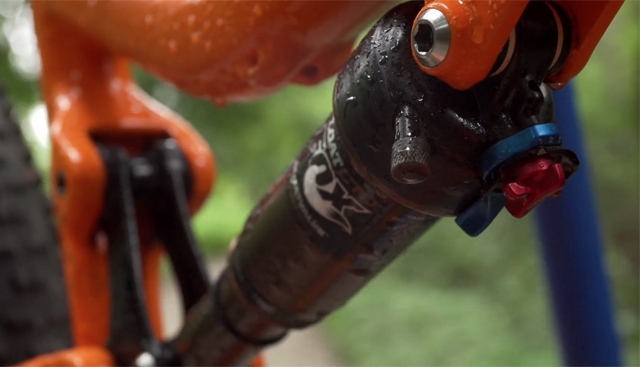
Once you've pumped up your suspension to recommended PSI, push the rubber ‘O’ rings down to the bottom of the fork stanchion or shock piston. Then TAKE THE PUMP OFF. Next, get on the bike with your helmet and pack and assume a neutral/ready position, not like a gorilla or not like a dainty ballerina, do it as evenly as possible. Then dismount, again, not like a gorilla or ballerina, like a person. The rubber ‘O’ rings should now sit about 1/5 th to 1/4th the way up the stanchion or piston.
 If the ring is too low, remove some air and repeat the process (note that this shock is too high - 'O' ring should be closer to the canister).
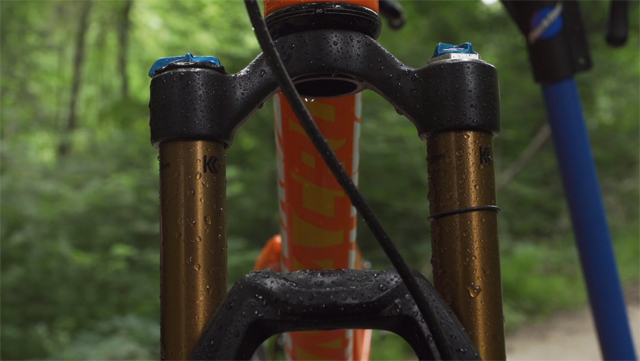 If it's too high, add pressure and repeat the process. Remember to REMOVE the pump after each try.
After you've gotten off the bike and the rubber 'O' rings sit at 25%, or whatever is recommended, the sag is properly set. A friend of mine in the industry pointed out that getting your rear shock's sag to manufacturer spec is critical, as the suspensions are designed by guys with super-impressive engineering degrees to work at specific tolerances. Forks are a little more about personal preference . You’re now ready for rebound.
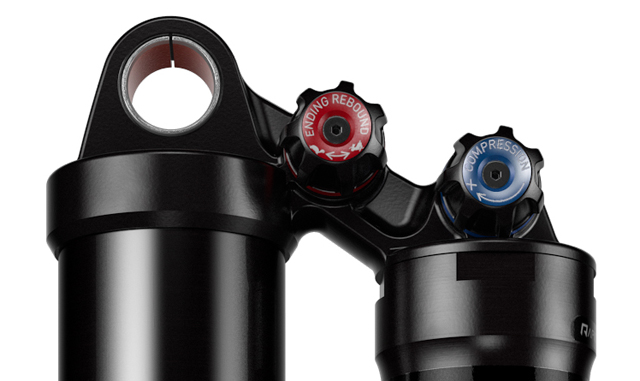
REBOUND
 Rockshox now uses little turtle and rabbit icons, which kind of work for me.
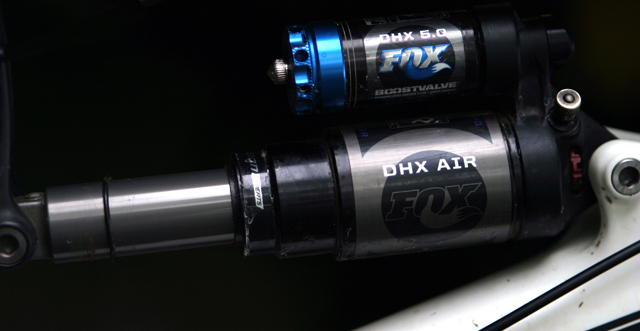
Rebound controls the rate of speed at which fork stanchions extend back out of the lowers (or the shock’s piston out of its air canister) after compressing. Basically how fast your fork or shock returns to full extension after taking a hit. Using the rebound adjust dials, adding damping (+) slows down rebound. Reducing damping (-) speeds up rebound. I’ve always found this counter intuitive, but maybe that’s just me.
Standing next to your bike, grab the handlebars and push the fork down and up EXACTLY like a gorilla. If it’s slow and lags, reduce (-) rebound damping to speed it up, if it’s pushing back way faster than your hands come up, add (+) damping to slow it until it feels quick but not violent.
 On my Fox fork, the rebound damper adjust is at the bottom of the leg.
Do the same with the shock. Bounce on the bike like a monkey. If your shock is too fast, it will ‘top out’ harshly. If it does, add some rebound damping to slow it down.
Now you’re in the ballpark. Go outside for a ride to finish this.
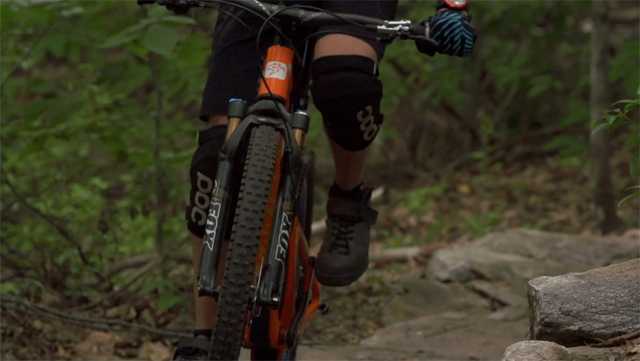
 Find a familiar piece of terrain with some
closely spaced bumps and rocks. To suss out the last few tweaks, ride up and down a few hundred yards on that same section. Here’s what you’re looking for:
Find a familiar piece of terrain with some
closely spaced bumps and rocks. To suss out the last few tweaks, ride up and down a few hundred yards on that same section. Here’s what you’re looking for:
If your rebound is too fast (damping too low), your bike will feel like a pogo stick. Too slow (damping too high), means many subsequent hits will cause your fork to pack down and feel harsh – because it doesn’t have enough time to fully re-extend before absorbing the next hit.
IF YOU FEEL: After you go over a feature or bump your bike bucks back, throwing you off balance too far forward or back.
DO THIS: Add (+) rebound damping to reduce the rate of return.
IF YOU FEEL: After a few bumps, the bike feels lower and you’re not getting shock absorption. There’s just no action, Jackson.
DO THIS: Remove rebound damping (-) to increase the rate of return.
 You’re looking for that sweet spot where
suspension rebounds quickly, ready for the next hit, just shy of a bouncy, pogo
stick feeling.
You’re looking for that sweet spot where
suspension rebounds quickly, ready for the next hit, just shy of a bouncy, pogo
stick feeling.
Once you’ve found the right balance, move onto compression.
COMPRESSION
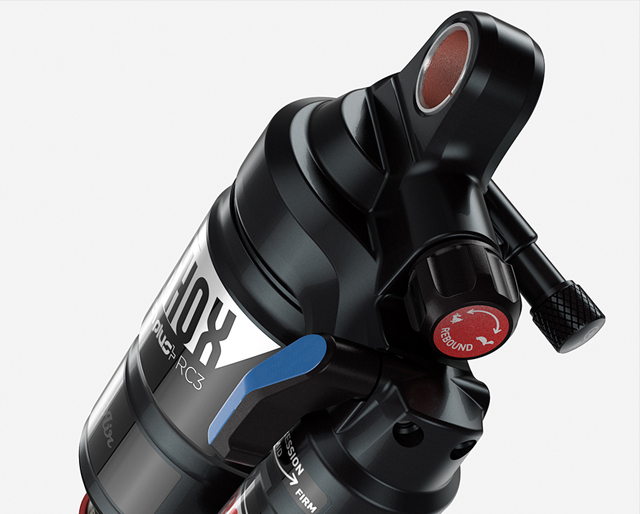
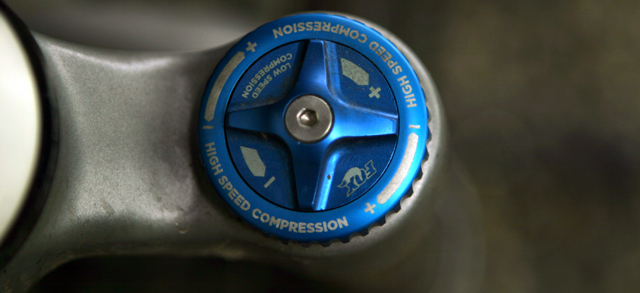 Low and high speed compression adjustment dials
This is the rate at which the stanchions or piston compress into the fork lowers or shock canister over terrain at high or low speeds. Again, adding compression damping (+) increases stiffness and reducing compression damping (-) makes things more supple. I’ll never get over this. For Fox, this is controlled by C, T, D modes, with C being more compression damping and D being less compression damping. It's a simple description and works, but... whateva. They’re dumping CTD for 2016.
Low-speed Compression
 Ride along that same piece of terrain or, if you're getting eaten alive by mosquitoes, just head out. Tweak low speed compression by paying attention to these things:
IF YOU FEEL: The suspension bouncing or fork diving dangerously at the bottom of a slow roller. Movement while braking a little, changing directions on a climb or switchback, or if you feel like there’s just too much play in your suspension climbing a fire road.
DO THIS: Add (+) low speed compression damping to stiffen up your fork at slow speeds.
IF YOU FEEL: Your fork isn’t tracking over terrain while climbing and you’re getting wheel-stopped all over the place on roots and rocks.
DO THIS: Reduce (-) low speed compression damping to soften your fork at slow speeds.
High-speed Compression
 High speed compression you have to adjust in response to input at higher speeds.
IF YOU FEEL: On bigger hits, landings and square edges at speed, you’re not using all your travel, or things just seem too firm.
DO THIS: Suck it up! Or reduce (-) high-speed compression damping for a softer ride.
IF YOU FEEL: You’re going through too much travel on easy terrain when going fast.
DO THIS: Add (+) high speed compression damping to save some of that travel for the crazy stuff.
Conclusion
Once set, you’ll probably touch sag and rebound less often (though check fork/shock pressure regularly to make sure PSI stays the same). High and low-speed compression you can fiddle with more based on terrain and personal preference.
To change ride quality, use rebound and compression adjustments first, before getting out the pump to add or remove PSI. Air pressure is a sledgehammer, tuning adjustments are a scalpel. Get it right with the precise tools before going back to the hammer.
However, if the weight being carried (heavy backpack, belly-fat) fluctuates then, yes, reset sag with PSI to your new weight rather than tweaking settings you’ve spent months getting perfect.
If you have a fork with adjustable travel lengths, all settings should dynamically adapt for lowering the travel to climb and raising it to descend.
About The Author
stash member Gunnar Waldman
Editor-at-Large, IMBA instructor and east-coaster. Raced Trans-Savoie in France, SoCal Enduro and Endurance in Temecula and is psyched for all the great new races in the east. Article Ideas: gunnar.waldman@tetongravity.com
edupacios
December 26th, 2015
Nice article! Thanks! It’s easy to understand for beginners like me. I registered to the site only to leave you this comment! I’ll look for more articles here