tags:
Jackson Hole, WY, United States |
trail building |jump building |how to build a jump |how to build a dirt jump |how to build a bike jump |dirt |bike
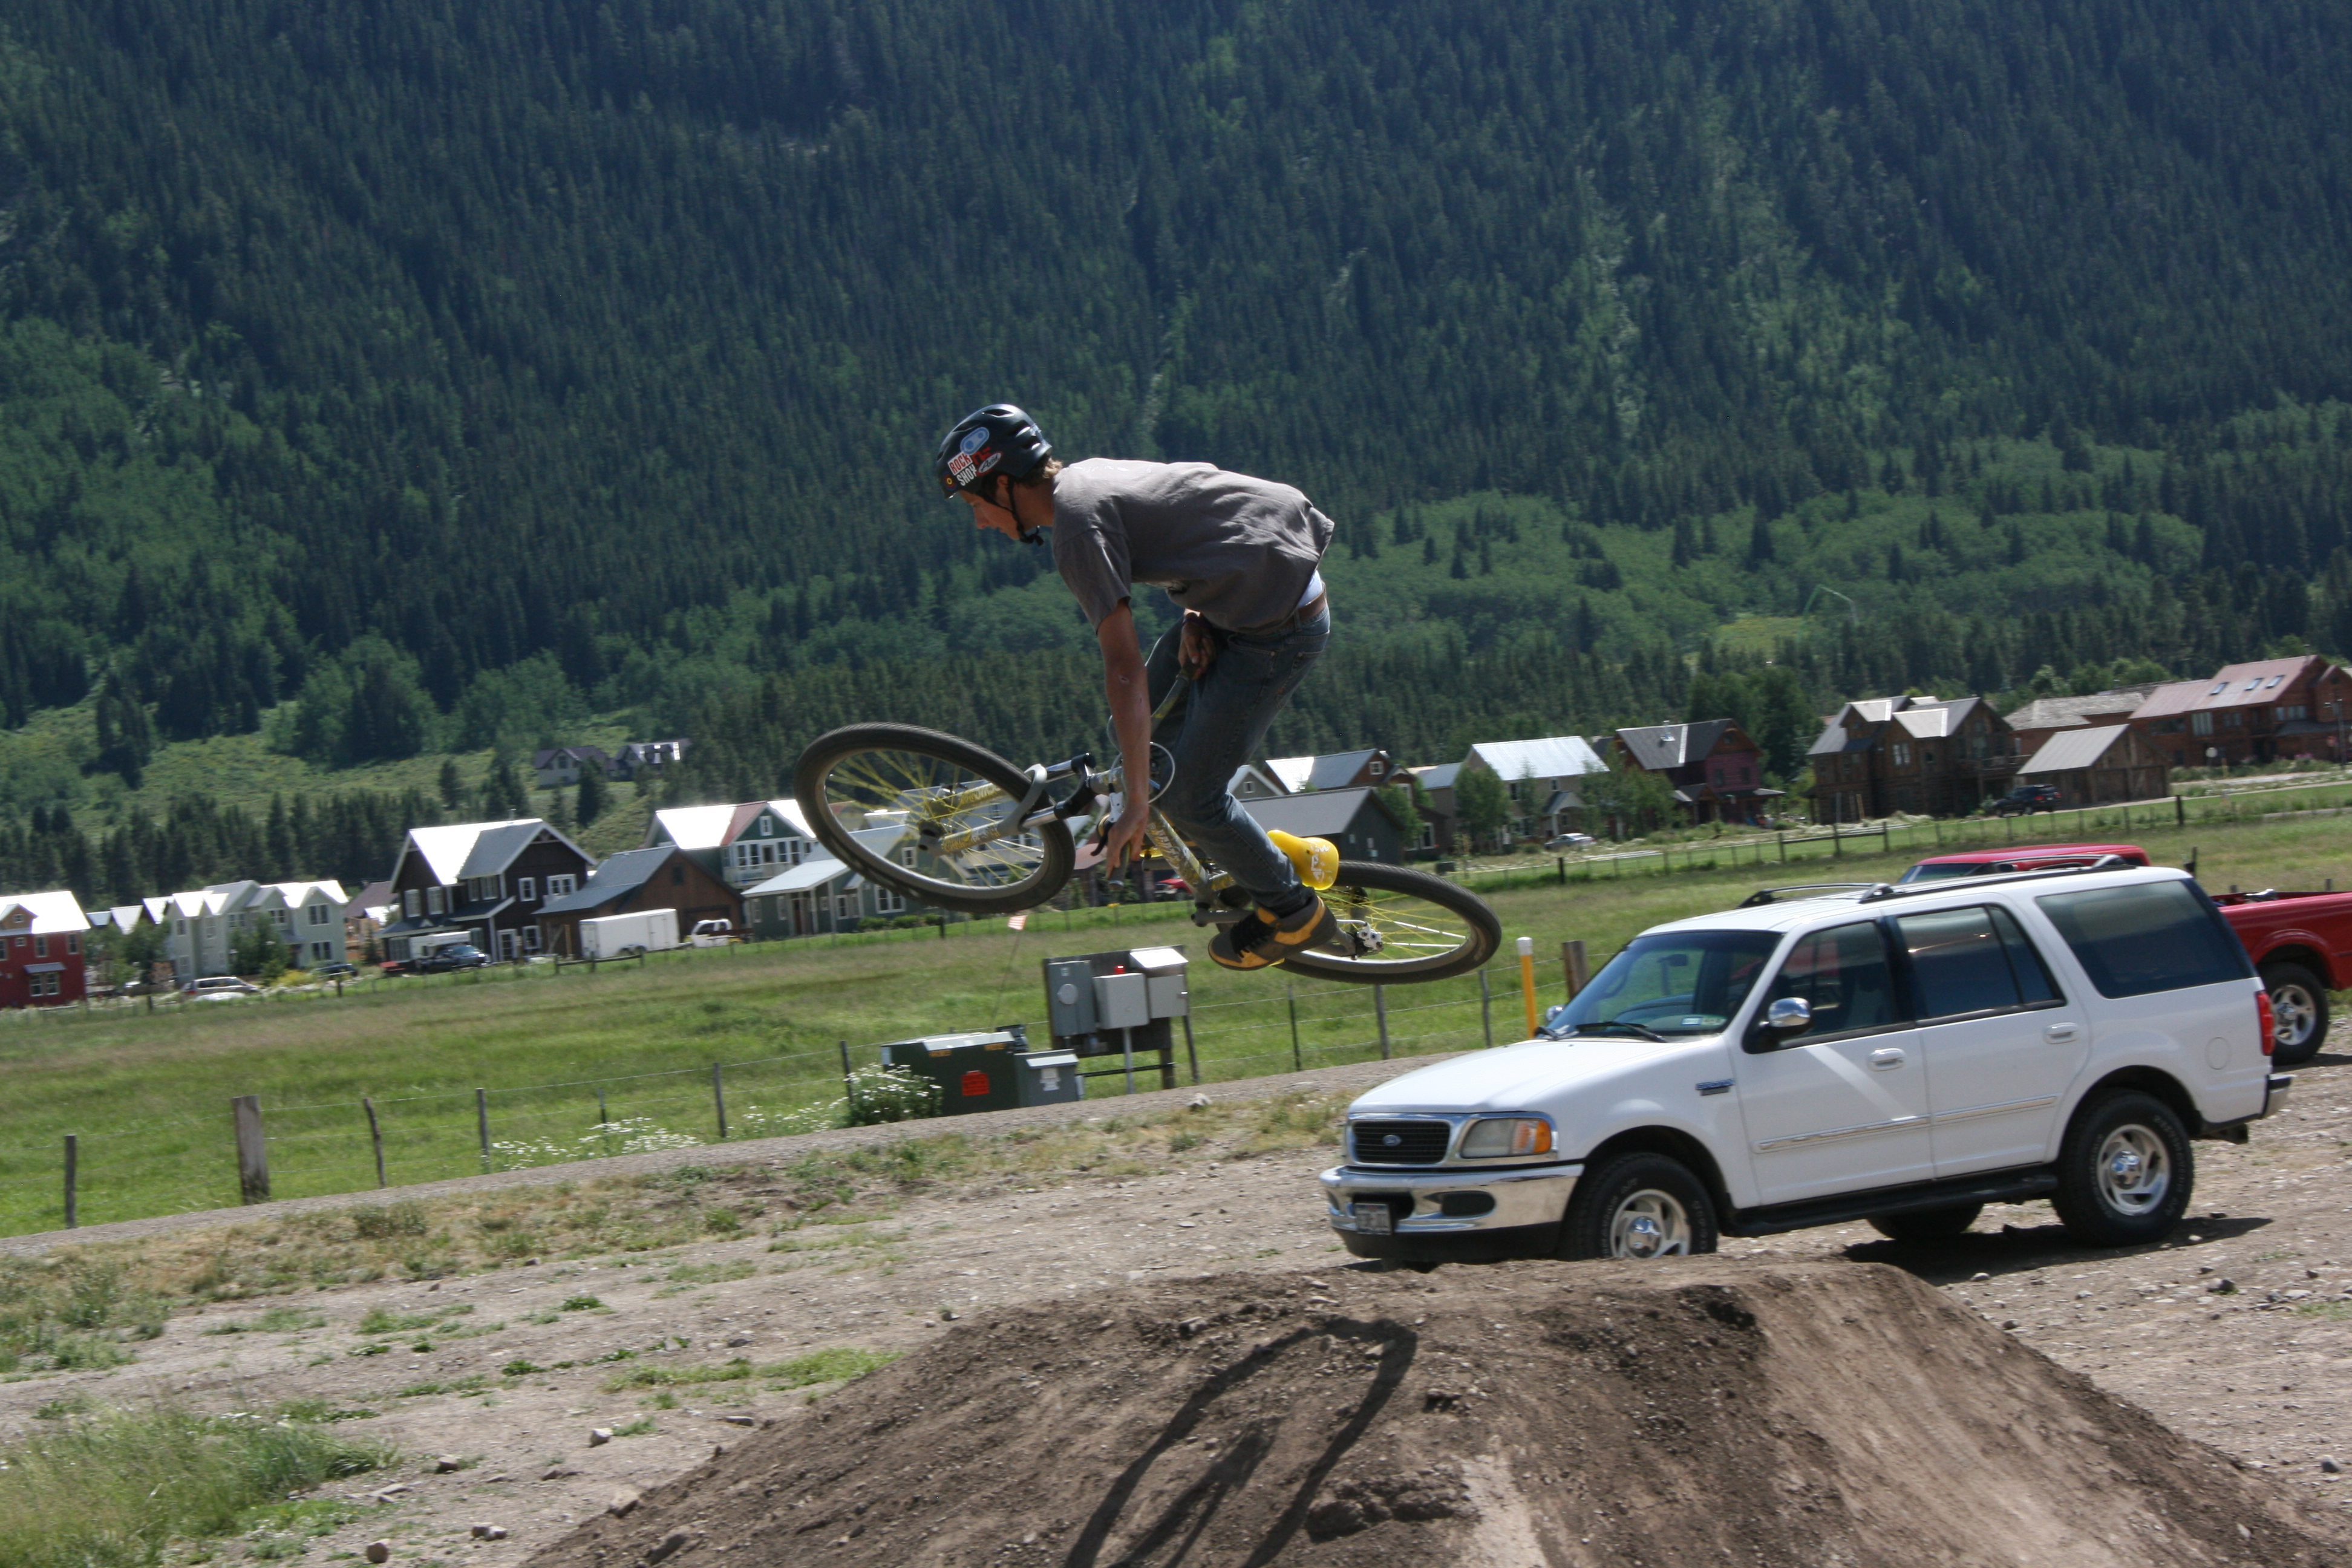
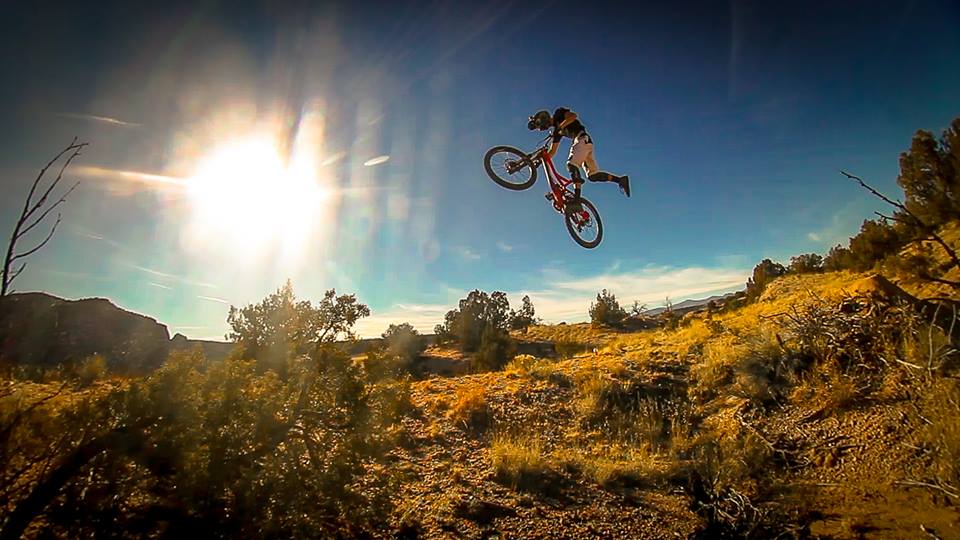 TGR intern Henry Lashman delivers on a well-packed lip at The Well in New Mexico.
As a builder, I thought I'd go ahead and share some knowledge I have acquired over the years on how to create, build, and sculpt pretty-looking and solid jumps that punt you into the air and put a smile on your face.
Find a good location
I love to use natural topography before I build a jump. It makes life a lot easier, especially if you want a big lip or landing. Drainages (sometimes problematic), landslide areas, boulders, or other features are always a great starting point. At this point, it is VERY important to check the speed you will have coming in. This is a rough estimate, as a fast, packed in-run will be faster than you think. However, it is always better to have too much speed and brake into the jump rather than too little and case the thing.
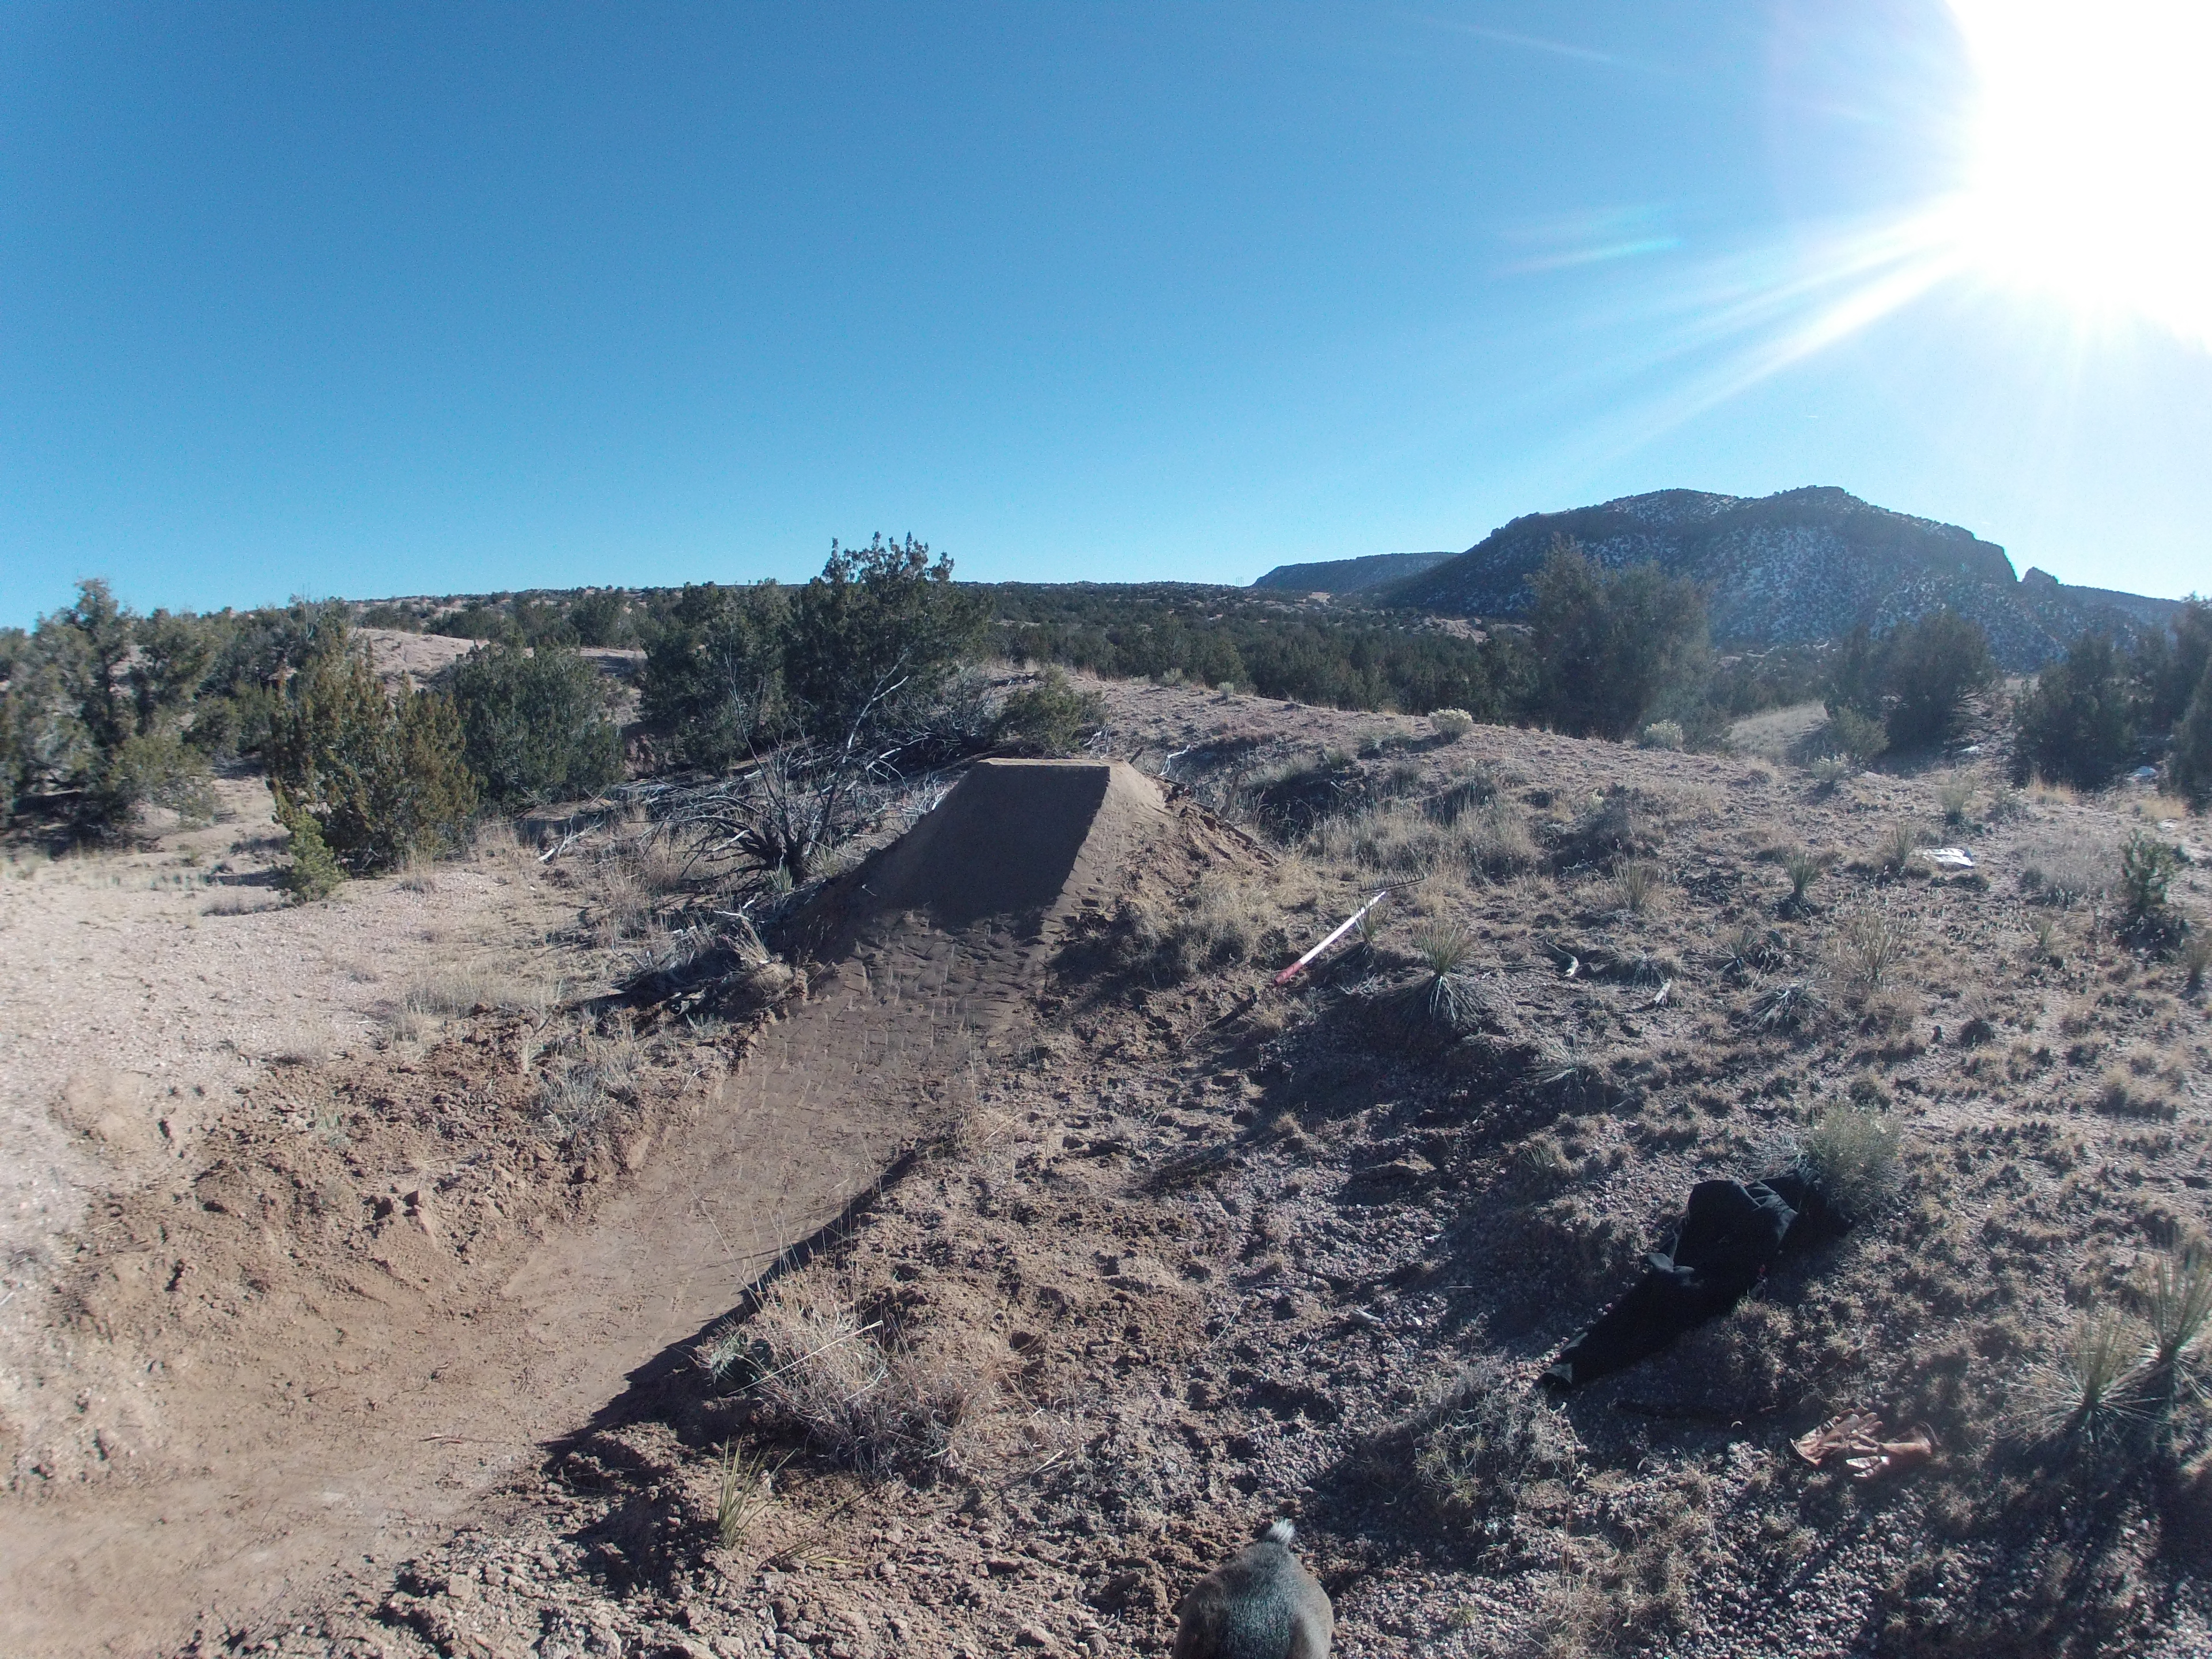 Here, topography was essential for a big hit. The old railroad grade in the background made for an easy landing, and the erosion remnants made a lip easy to sculpt.
Move Some Dirt
Grab a buddy or two, and start pilin'. I normally build with a flat shovel (moves a lot of dirt, and works awesome for packing), and a rake to smooth things out. This stage, while it seems rough, is important. If you are digging in dry conditions, and you want the jump to be rideable soon, you need to first throw a layer of dirt, then sprinkle some water, pack it down, and repeat. This builds a solid base to the jump so you won't simply blow through a loose mound on your first hit. You cannot just water the top layer and expect it to hold up (however, a long rain on dry soil will usually suffice).
For Lips:
As far as where to get the dirt, I usually dig right in front of where the future lip will be. If you have a pit before your dirt mound, it usually doubles your jump size (bottom of pit to top of lip). Also, it allows the rider to pump the transition better. Usually, you can dig a drainage ditch from the pit downhill. This also provides extra dirt for the jump. If you cannot do this, and dirt is scarce, pile rocks, logs, or whatever else is around (I've used refrigerators before), and then proceed to harvest dirt from a separate location and shuttle it over via shovel, buckets, or wheelbarrows to pile on top. Use the same water-pack-repeat cycle as before if the dirt is dry.
For Landings:
Do the same thing as for the lip, but make the landing wider, taller, and longer. This insures a nice safety pad for miscalculations. Dig a hole in front of the landing for dirt, but be sure this hole does not have a harsh uphill at the end of it. Overshoots could yield a harsh ending . . .
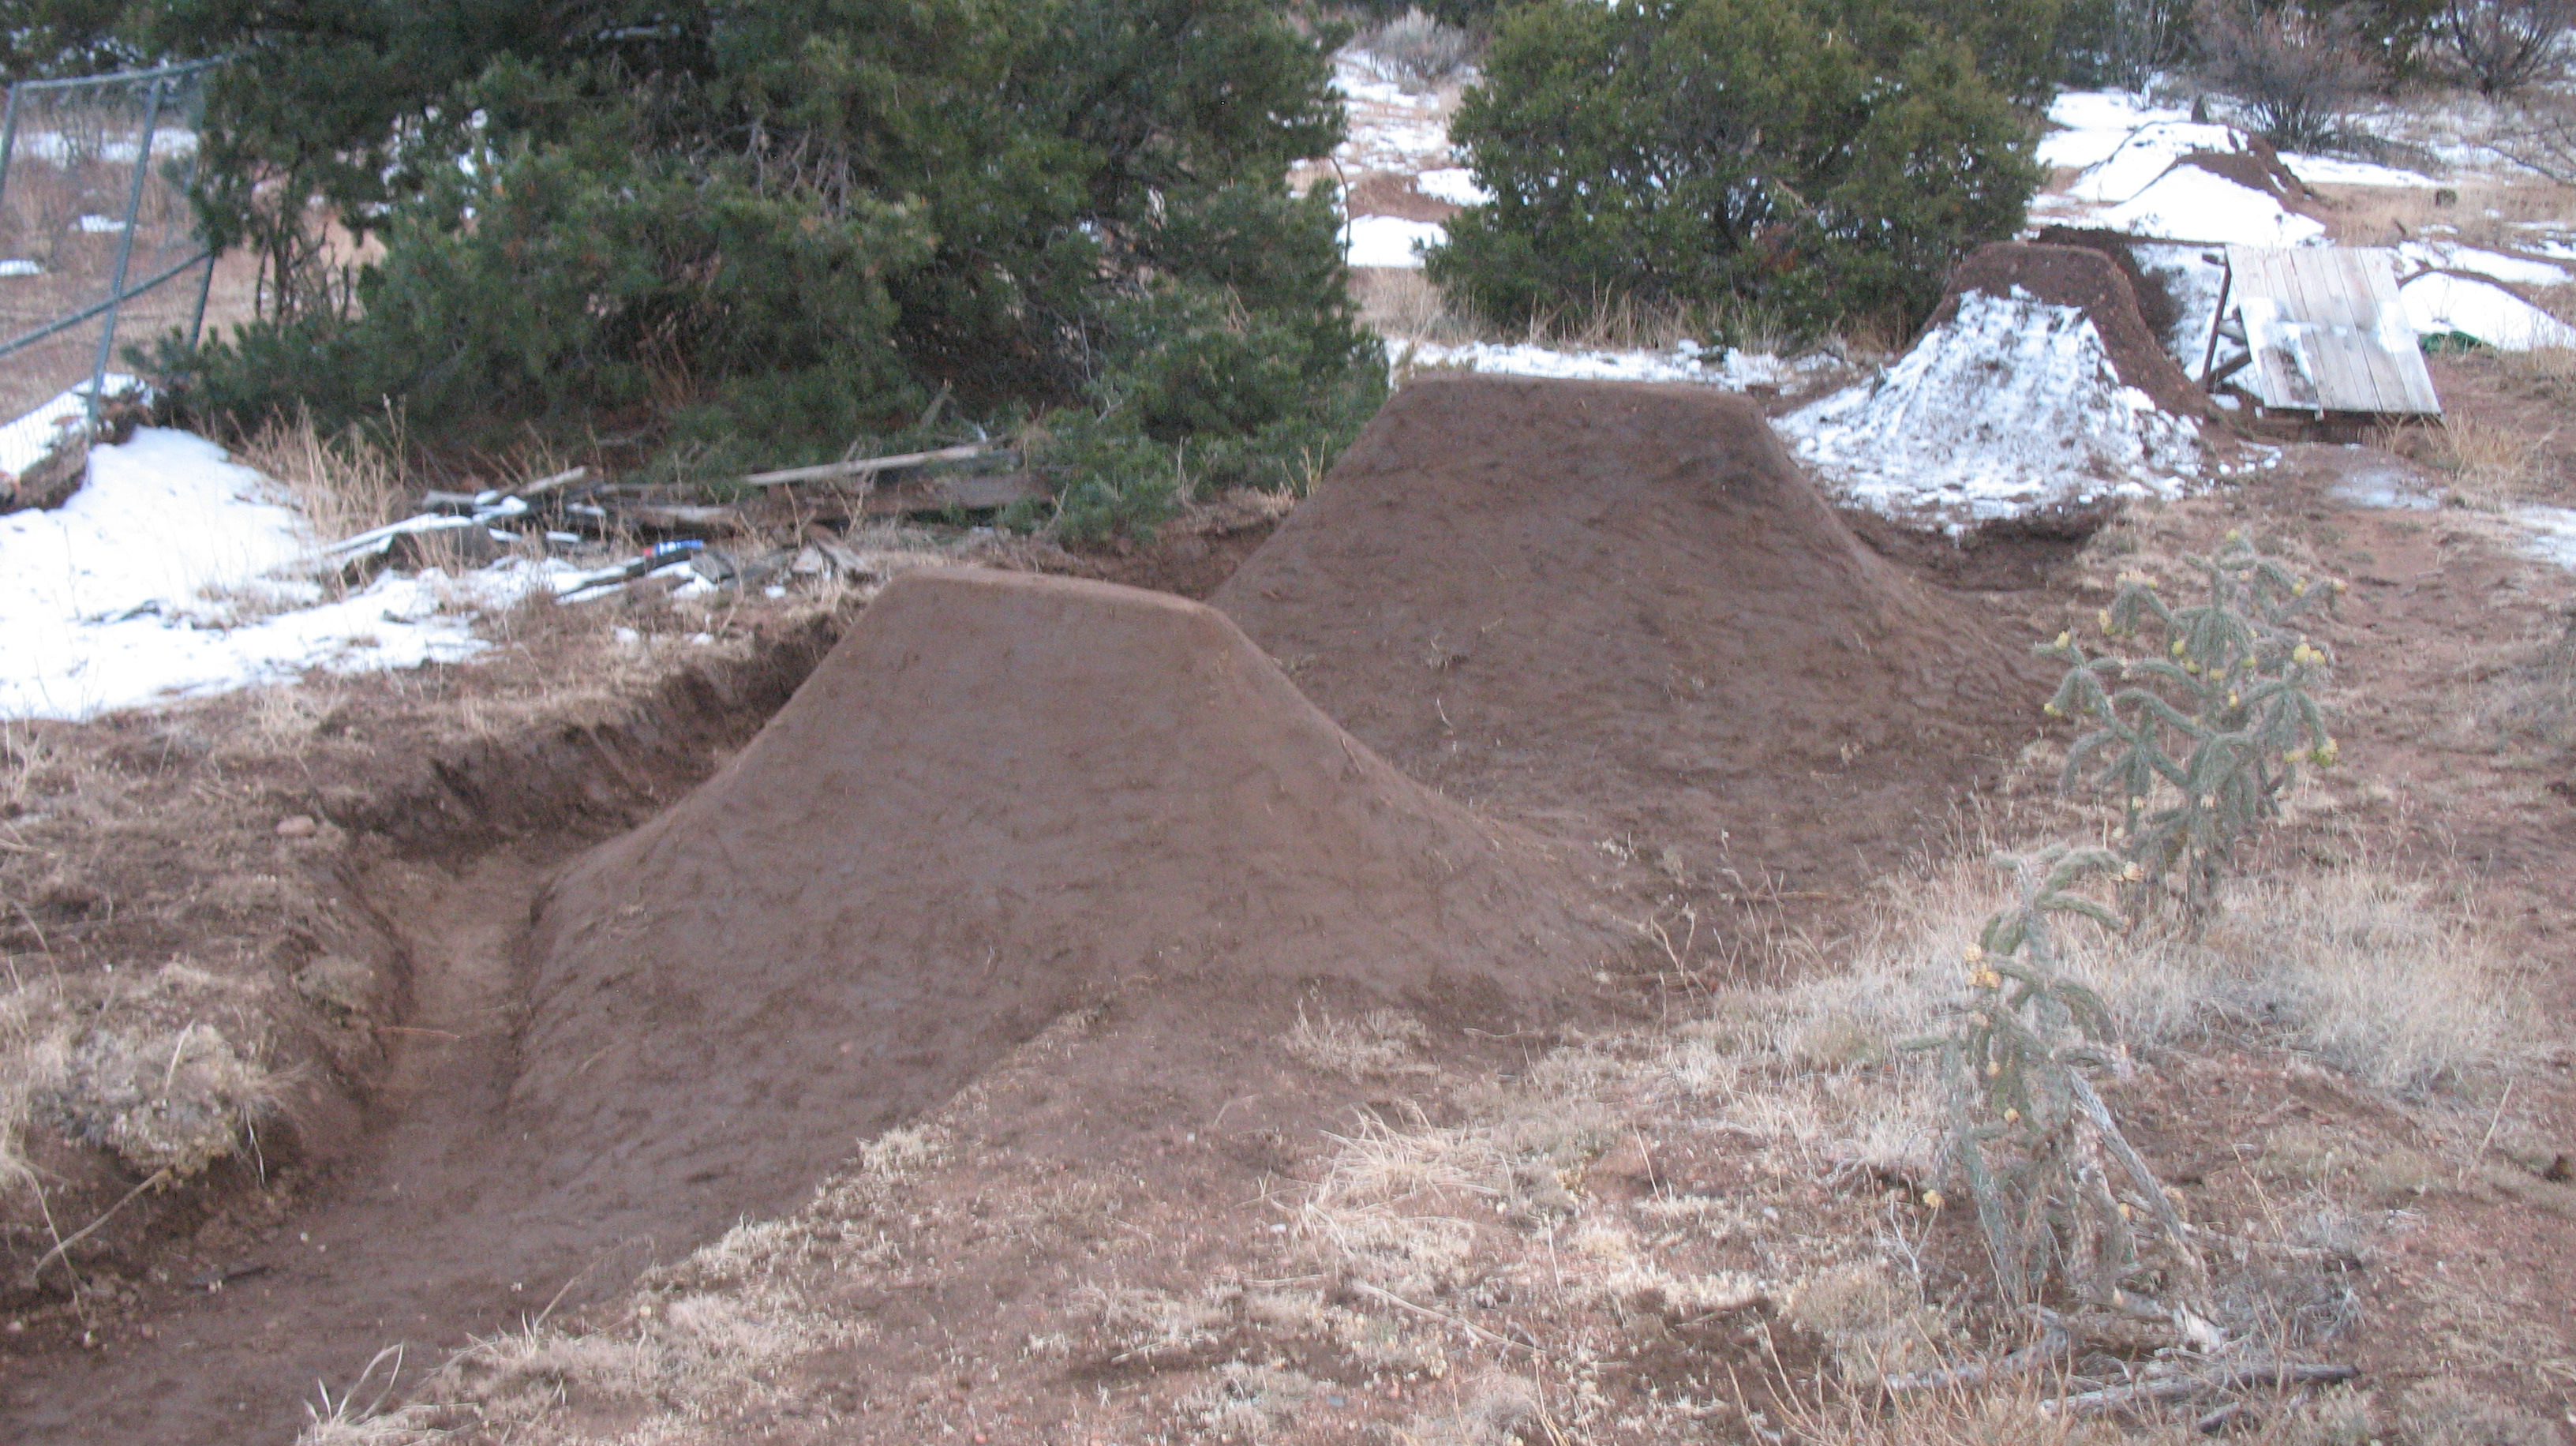 My yard had mashed potato-soft dirt, so I could dig in front of lips and behind landings easy. Drainage allowed for even more dirt (seen on left).
Sculpt 'er Up!
Now, the important part. Finishing the lip is important, as it will dictate where the hell you go once your tires leave the ground. Gently water the lip (do not over saturate, as it will stick to your shovel. If you have this problem, likely due to a very clay-rich soil or constantly wet conditions, spray some WD-40 on the backside of your shovel. This will prevent the dirt from sticking. This works well for packing) and rake the entire thing (front, back, sides…anything you will be packing). This removes the larger particles, which means the remaining smaller ones will pack into a tight, cohesive mass. You can do most of the sculpting with the rake, pushing and pulling the dirt around.
 Movin' dirt around to be sure it's wet throughout.
This is a good check-point. If you find any dry dirt, chances are that it will not pack, and will slowly break down your jump as it dries and gets ridden. Be sure the dampness is consistent throughout, being wet enough to pack, but not overly wet to where it sticks to your shovel.
 This lip here wasn't wet throughout on the top left, and look what happened after a day.
As far as the curvature of the lip, it's all preference. There are three main types of lips I've ridden, and they all seem to work, yet give different feels.
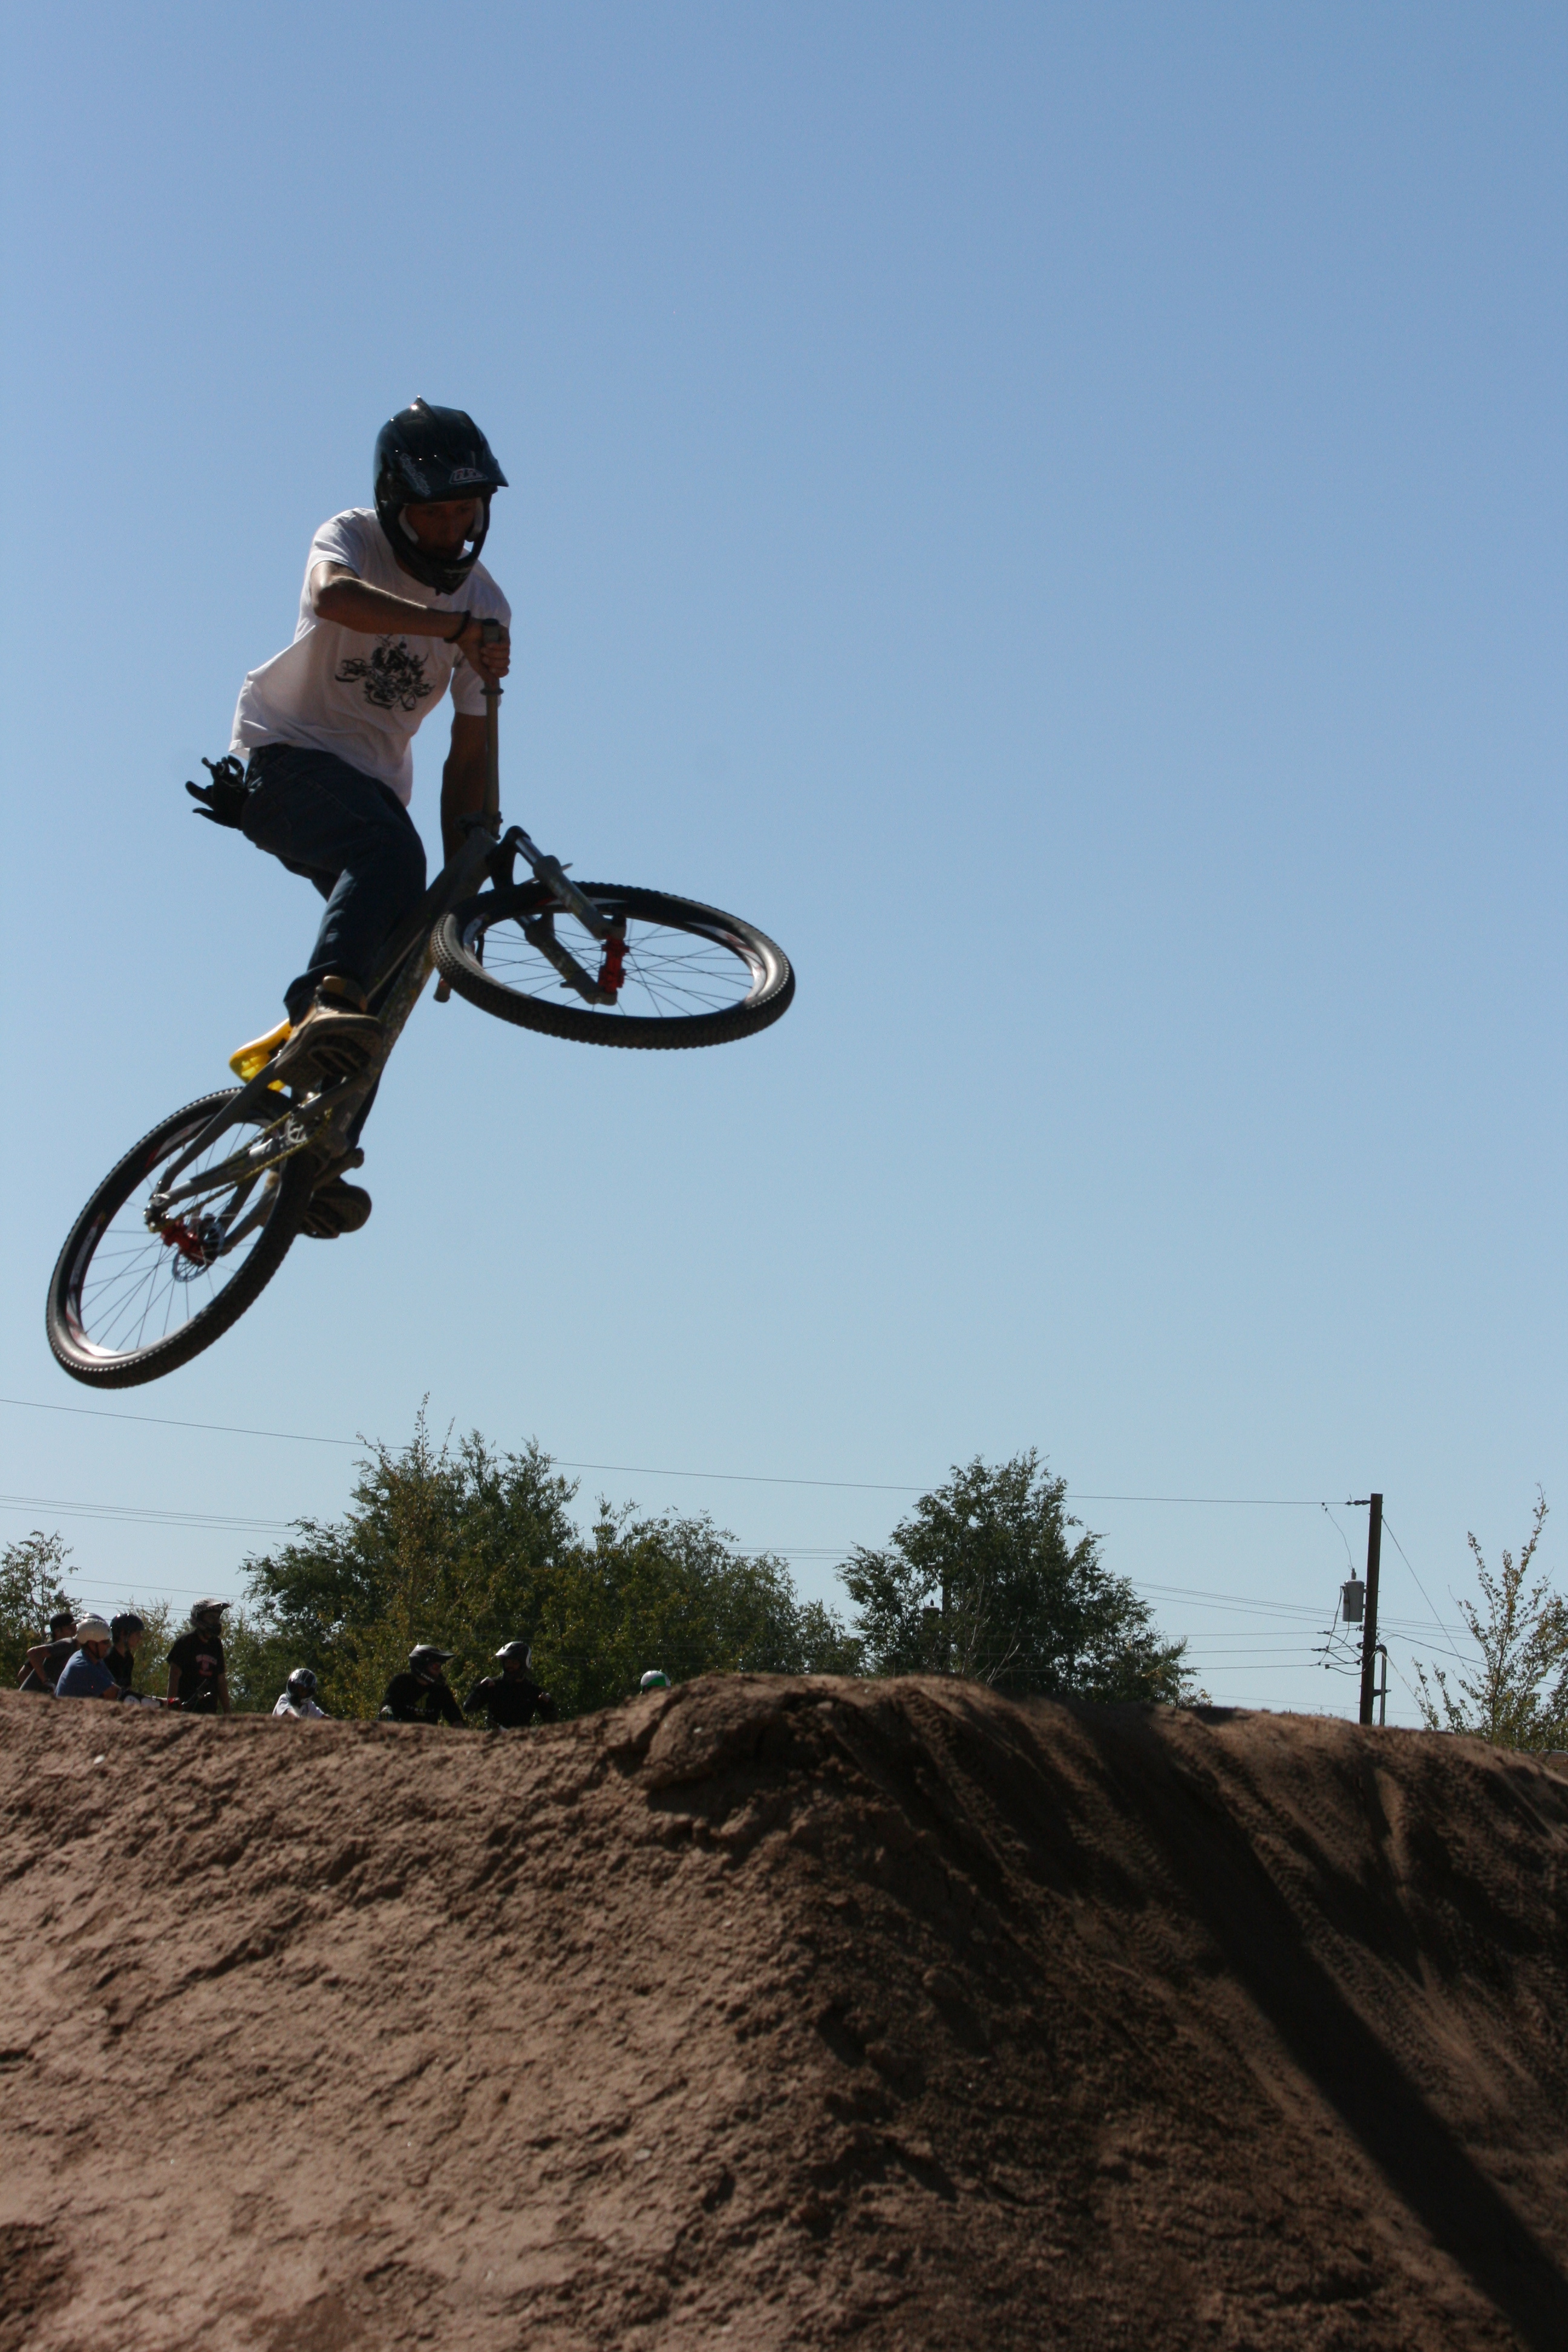
1) Smooth Transition to a Steep Top:
 A steeper, poppier take-off is better for hardtail bikes and are the common jump types in tightly-packed dirt jump parks.
This type of lip seems to be more popular with free riders and dirt jumpers. The lip is smooth and consistent, but then gets very steep towards the top. These lips are better for slower, poppy-er, tall jumps, and are best ridden by hardtails and BMX bikes.
2) Radius Ramps:
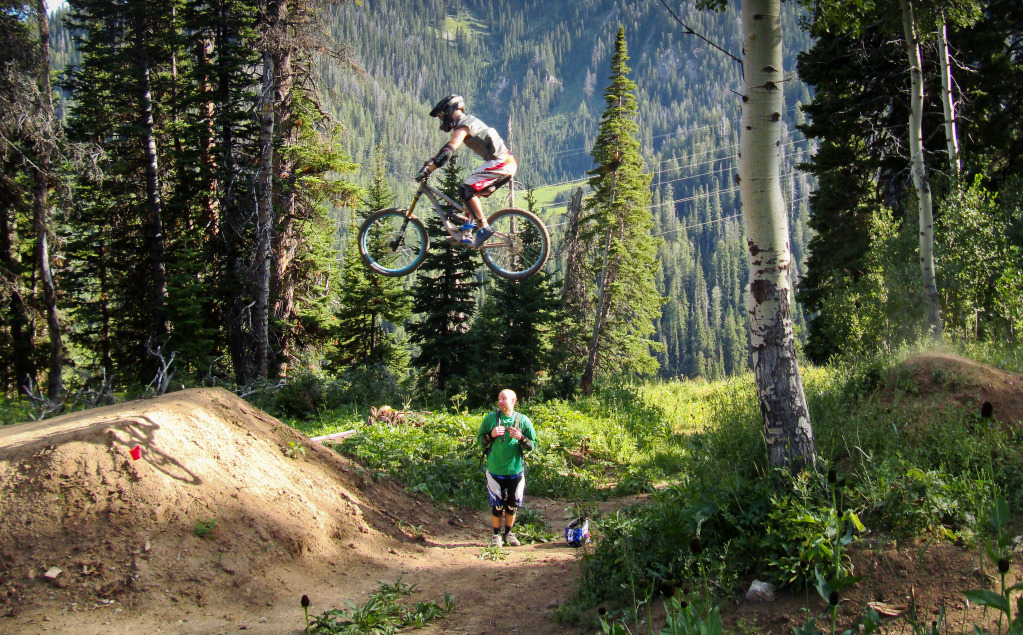
.jpg.jpg) Radius lips, like this one on the Bandit trail at Jackson Hole's bike park that Andrew Whiteford is ripping off of, are more common in machine-built bike parks and work for all types of bikes. Patrick Nelson/JHMR photo.
Radius lips, like this one on the Bandit trail at Jackson Hole's bike park that Andrew Whiteford is ripping off of, are more common in machine-built bike parks and work for all types of bikes. Patrick Nelson/JHMR photo.
These types of lips are a continuous, smooth arc. Most wooden ramps are built using a radius, and it leads to a smooth, gentle hit. These are used for all sizes and types of jumps. With dirt, they are hard to achieve. Eye balling it from the side can help.
3) Transition to Linear:
 These kind of jumps end in a flat lip, which is easier to handle at the high speeds necessary to clear gaps like this one on Fuzzy Bunny on Teton Pass. Photo by TGR Forum member springsproject.
These types of jumps I have seen, but more recently seen work very well on the Teton Pass trails. There is a transition, but the lip then continues without a curve, taking on a airplane-take off type of curvature. They work great for any sized jumps, especially larger ones.
As far as the landings, it is very dependent of your lip and your distance/height. If you have a poppy jump, chances are you want a steeper landing. A more mellow jump requires a more mellow landing. Think about throwing a rock at different angles how that rock will come down (parabolic; at the same angle it left).
Now that you've picked your curve, start the packing. People sometimes use tampers, but for jumps, the flat surface of the tamper leaves lines and edges that will further deteriorate the curved lip. Smack up and down and all around the jump. I like to square off the edges, then pack them down to prevent them from falling apart. As long as you pack everything (prevents it from eroding), and pack the riding surface until it starts pinging (this will hurt your arms when this starts to happen), you should have a solid, solid lip/landing.
Test That Baby!
The critical time comes down to testing. Hit the jump a few times and see if you like it. If so, then awesome! If not, scratch the lip/landing with the rake (scratch and slip method in Ceramics!), and throw some more dirt on/take some off. You should be able to find something that works.
About The Author
stash member Henry Lanman
I am a Santa Fean at heart who loves to ride any sort of two wheeled vehicle.